Welcome to the second video of the Rhythm Guitar Quick-Start Series. In this lesson, we’re going to cover power chords. Power chords are some of the most essentials guitar chords you’ll need to have in your toolbox.
In this lesson, I’ll teach you three basic shapes for power chords, we’ll concentrate on getting those shapes mastered. Once you have power chords down, you’ll be able to use them in any style of music including jazz, rock, reggae, country, and more.
A power chord is a two-note chord, with no major or minor quality to it. This is because power chords are just made up of the root and the fifth of the chord. The third of the chord, the part that usually gives the chord a major or minor quality, is left out of power chords. Don’t worry too much about the theory behind this though. What we want to do first is concentrate on getting familiar with the power chord shapes.
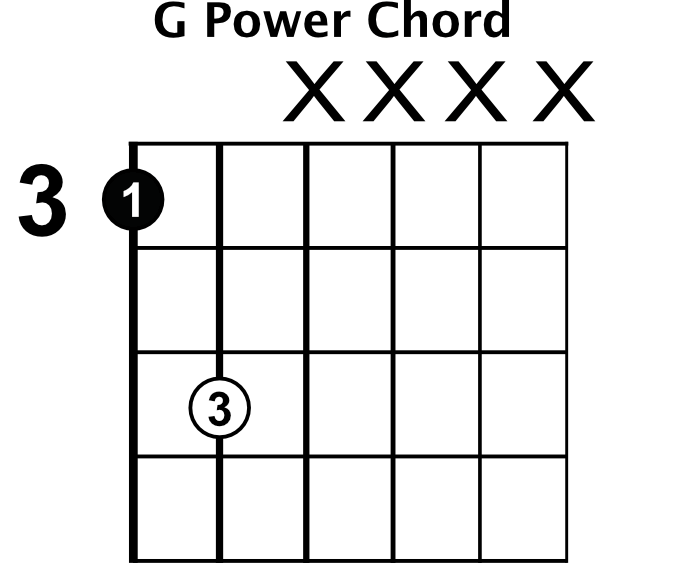
Let’s start with the first power chord shape. Place your index finger on the third fret of the low E string. When you’re playing power chords, the note you’re playing with your index finger will always be the root note of the chord. The root note is how we get the name for that specific power chord, so in this case, since our index finger is playing G note, this is a G power chord.


Now it’s pretty easy to follow the pattern to finish this power chord shape no matter where you are. Just go up two frets and over one string, putting your third finger down on that string, which here is the fifth fret of the A string. That finishes the shape of your power chord, and you can play it by strumming just the fifth and sixth strings.
The great thing about power chords is you can move them all around the fretboard. Get familiar with this shape, and practice moving it around the fretboard on the sixth string.
We’re going to make our next power chord shape by building off of the first one and just adding an extra note to it. It’s still just a two-note chord, but we’re going to double up on the root note.
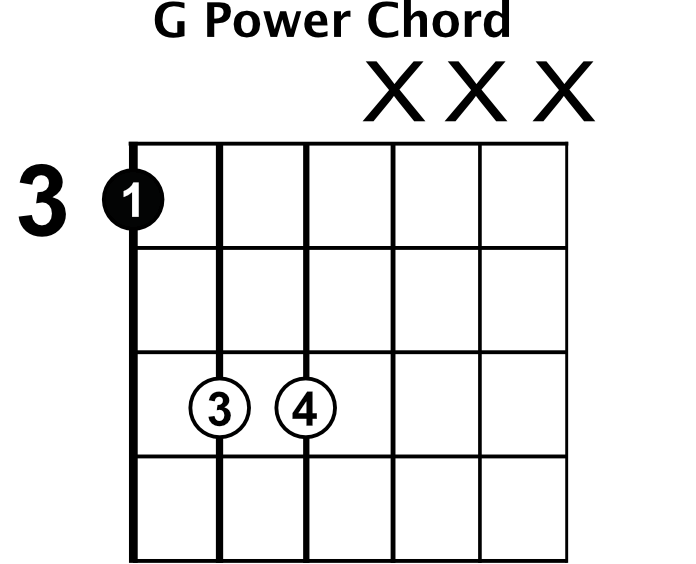
Start with your G power chord again, and then add one higher octave of your root G note by placing your pinky finger on the fifth fret of the D string. If you pick each string, you’ll hear that we still have just a G note and a D note, but the third string now adds the extra G note in the higher octave.
When you play each of the power chords so far, you’ll notice that this three-string version is fuller sounding that the two strings version. This will give you another flavor you can use for your power chords. Work on getting this shape down so your fingers can go right to it. Fingers right behind the frets, and be able to move the chord anywhere along the fretboard.
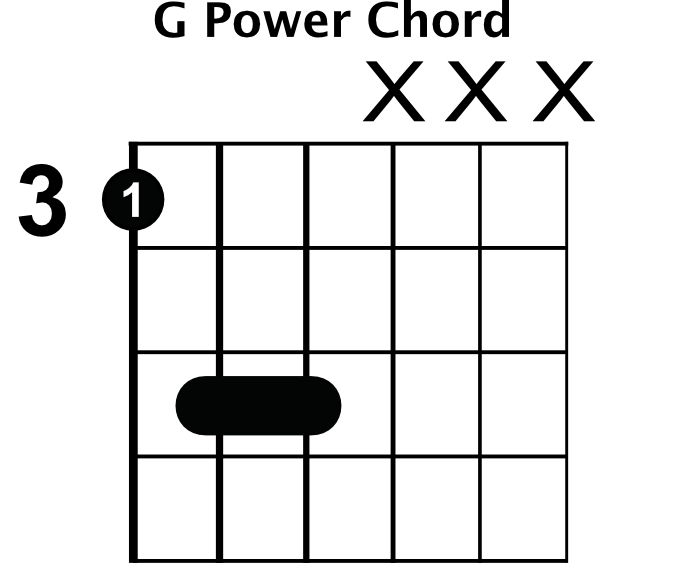
The third power chord shape we’re going to learn is the same shape as the last power chord, but rather than playing the two high notes with two fingers, we’re going to take our pinky off the string. Instead, we’ll make a bar with our third finger so it actually plays both of those notes.
This may seem awkward at first, especially if you’ve never made a bar with your third finger before. It will take some time to build the strength and dexterity to do it comfortably, but play around with it. Using your finger to make a bar for power chords becomes faster and easier than trying to place three fingers on the fret board. Work on getting comfortable with that power chord shape, and practice moving it up and down the fretboard.
Different situations will call for different power chord shapes that you want to use, so work on all three of these shapes and get familiar with all of them. It’s a simple technique, but it’s really important for you to add this skill.
In video three, I’ll show you how to put these power chords to work by moving them around the fretboard so you can play any power chord you need. We’ll also go over the note names for the fifth and sixth strings. See you in the next video: How To Use Power Chords.
Next Lesson - How To Use Power Chords
